Preparing a home for the winter months involves more than just turning up the thermostat and pulling out heavier blankets. True home winterization is a strategic process designed to protect the structural integrity of a building, maintain indoor air quality, and minimize energy consumption. When done correctly, these preparations prevent expensive emergency repairs and ensure a consistent level of comfort throughout the coldest part of the year.
However, many homeowners follow outdated advice or overlook critical areas that are susceptible to freezing temperatures. Research indicates that water damage from frozen pipes is one of the most common and costly homeowner insurance claims, with an average incident costing approximately $27,000. Yet, an estimated 98% of these disasters are preventable through proper maintenance. By identifying and correcting common winterization mistakes, it is possible to safeguard a property and improve its thermal efficiency.
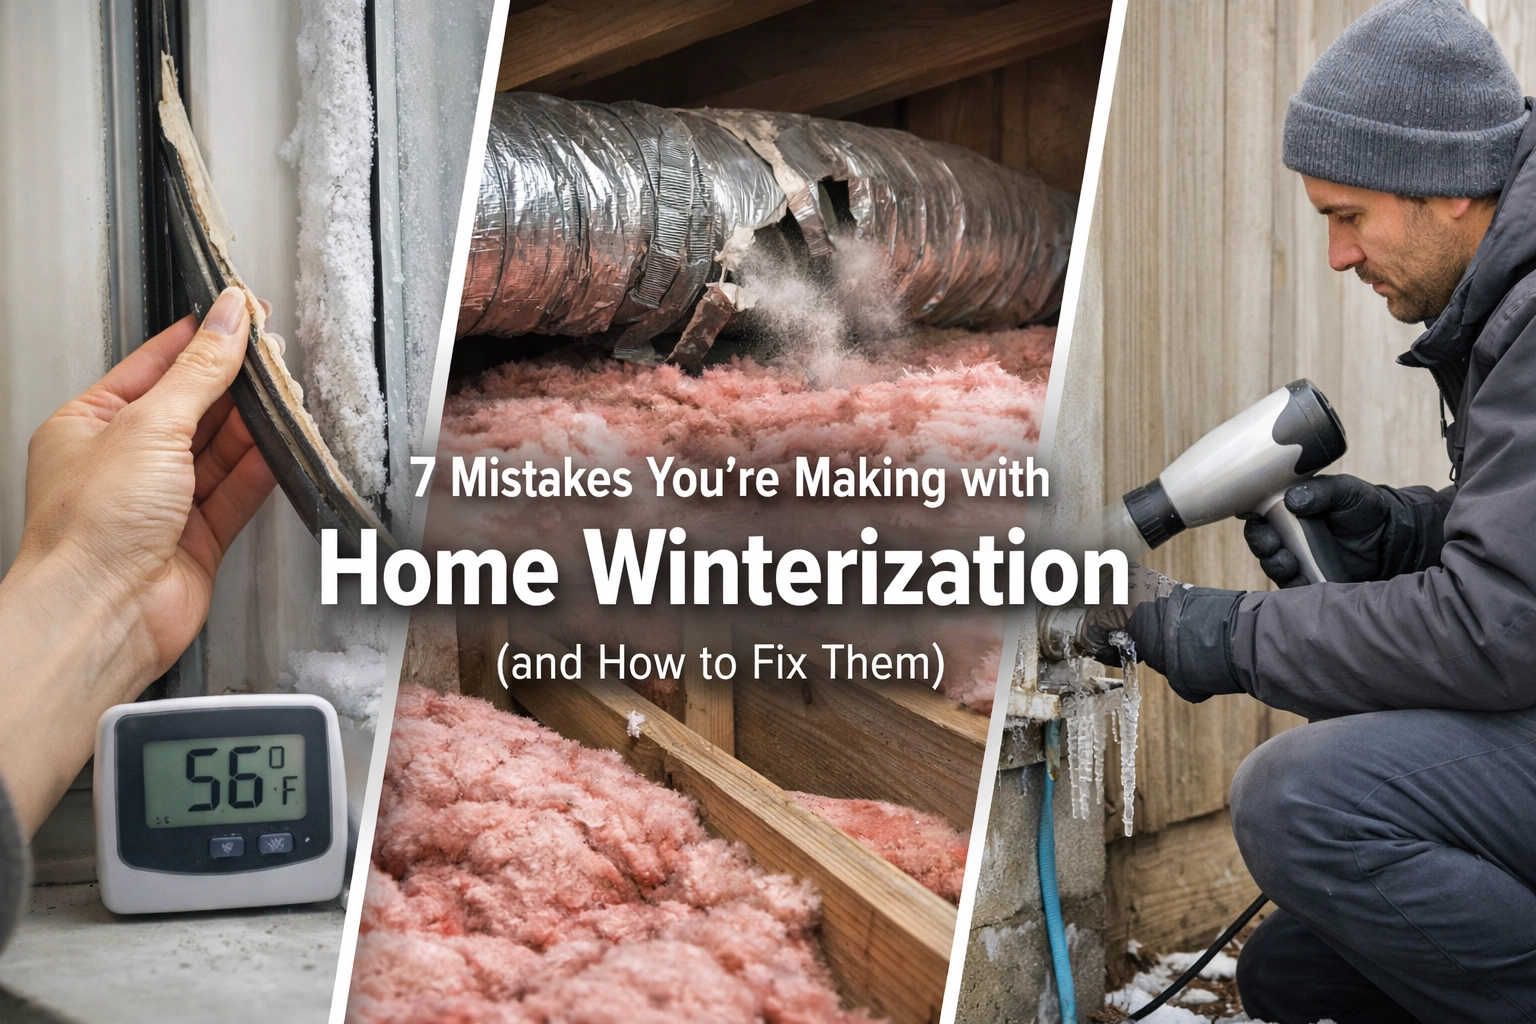
1. Failing to Properly Drain Outdoor Faucets
One of the most frequent errors occurs at the exterior of the home. Many homeowners believe that simply turning off the water to an outdoor spigot is sufficient. However, if water remains trapped in the pipe between the indoor shut-off valve and the outdoor faucet, it can still freeze. As water freezes, it expands by about 9%, creating immense pressure that can burst copper or PEX piping.
The correct procedure involves several steps. First, locate the indoor shut-off valve for the outdoor faucet and turn it to the “off” position. Next, go outside and open the outdoor faucet completely to allow any remaining water to drain out. If the indoor valve has a small bleeder cap, open that as well to let air into the line, which helps the water flow out more effectively.
Leaving a garden hose attached is a related mistake. A connected hose traps water inside the faucet and the pipe leading through the wall. Even if the indoor valve is shut off, the water trapped by the hose can freeze and expand back into the house, causing a pipe to burst inside the wall where it may not be noticed until the spring thaw. Always disconnect, drain, and store hoses in a garage or shed before the first frost.

2. Neglecting Pipes in Unheated Interior Spaces
While many people focus on the pipes located on exterior walls, pipes in unheated interior spaces like attics, crawl spaces, and garages are often the first to freeze. These areas are frequently overlooked because they are not part of the primary living space, but they house critical plumbing infrastructure.
Basements and crawl spaces are particularly vulnerable because they are often prone to drafts. A small gap in a foundation wall can allow a “jet” of freezing air to hit a specific section of pipe, causing it to freeze even if the ambient temperature in the crawl space is above freezing.
To fix this, inspect these unheated areas for any exposed plumbing. Wrap pipes in foam insulation sleeves or use heat tape for pipes in extremely cold-prone zones. Ensure that the insulation is fitted tightly and that all joints are taped to prevent cold air from reaching the pipe surface. For homes with crawl spaces, ensure that vents are closed during the winter months to maintain a more stable temperature, though they must be reopened in the spring to prevent moisture buildup.
3. Relying Solely on New Windows for Energy Efficiency
There is a common misconception that installing modern, double-pane or triple-pane windows is a “fix-all” solution for winter drafts. While high-quality windows significantly improve R-value (thermal resistance), they do not address the air leakage that often occurs around the window frame or the surrounding wall structure.
A brand-new window installed in a poorly sealed frame will still allow significant heat loss. Cold air often enters through gaps between the window casing and the drywall, or through the “rough opening” where the window meets the house framing.
The solution is to focus on air sealing rather than just the glass itself. Use a high-quality, paintable caulk to seal any gaps between the window trim and the wall. On the exterior, check for cracked or missing caulk where the window frame meets the siding. For older windows that cannot be replaced immediately, using temporary weatherstripping or window film kits can provide an additional layer of protection. For more technical information on home maintenance, resources are available at https://www.pariswheel.com/index.php/blog.

4. Allowing Gutters and Downspouts to Remain Clogged
Winterization is often associated with the interior of the home, but the drainage system is critical for preventing roof damage. When gutters are filled with autumn leaves and debris, they prevent melted snow from flowing away from the house. This trapped water can freeze, forming heavy blocks of ice that pull the gutters away from the fascia boards.
More importantly, clogged gutters are a primary cause of ice dams. An ice dam occurs when snow on the upper parts of a roof melts (due to heat escaping from the attic) and then refreezes when it reaches the cold eaves and clogged gutters. This ridge of ice prevents further meltwater from draining, forcing it under the roof shingles and into the walls or ceiling of the home.
To prevent this, gutters must be cleaned thoroughly after the last leaves have fallen. It is also important to ensure that downspouts are clear and directed at least three to four feet away from the foundation. During the winter, a roof rake can be used to remove heavy snow from the first few feet of the roof edge, which reduces the material available to form dams.

5. Over-Insulating or Blocking Attic Ventilation
In an effort to keep the home warm, some homeowners make the mistake of packing as much insulation as possible into the attic, sometimes covering the vents at the eaves (soffit vents). While increasing insulation is generally beneficial, blocking ventilation is a major error that leads to two significant problems: moisture buildup and ice dams.
A healthy attic needs to breathe. Proper ventilation allows cold air to enter through the soffits and exit through the ridge or gable vents. This keeps the roof deck cold, which prevents the uneven melting that causes ice dams. Furthermore, without ventilation, moisture from the living spaces (from cooking, showering, and breathing) can migrate into the attic and condense on the cold underside of the roof, leading to mold growth and wood rot.
When adding insulation, ensure it is installed on the attic floor and not against the roof deck (unless the attic is specifically designed as a “conditioned” space). Use baffles: plastic or foam channels: to ensure that the insulation does not block the airflow from the soffit vents. Aim for an insulation level of R-40 to R-60 in colder climates, which typically equates to about 15 to 20 inches of blown-in cellulose or fiberglass batts.

6. Skipping Water Heater Maintenance
The water heater works significantly harder during the winter months because the “influent” water: the cold water entering the home from the city or well: is much colder than it is in the summer. If the unit is not maintained, this increased demand can lead to inefficiency or total failure.
Over time, sediment (minerals like calcium and magnesium) settles at the bottom of the water heater tank. This sediment acts as an insulator between the burner or heating element and the water, forcing the heater to run longer and hotter to achieve the same temperature. This not only increases energy bills but also stresses the tank metal, potentially leading to leaks.
A simple fix is to drain and flush the water heater once a year. By attaching a hose to the drain valve at the bottom of the tank and running it to a floor drain or outside, the accumulated sediment can be cleared out. Additionally, checking the temperature and pressure relief valve ensures the unit is operating safely. For those looking to save more on energy, insulating the first six feet of the hot and cold water pipes connected to the heater can prevent heat loss. Information regarding service standards and support can be found at https://www.pariswheel.com/index.php/customer-help.

7. Neglecting the HVAC System and Air Filters
A common mistake is waiting for the first freezing night to turn on the furnace for the first time. HVAC systems that have been dormant for months may have developed issues like dusty burners, worn-out belts, or failing sensors. Running a system that is struggling to operate can lead to a mid-winter breakdown when repair technicians are at their busiest.
Furthermore, many homeowners forget to change their air filters before the heating season begins. A clogged filter restricts airflow, forcing the blower motor to work harder and reducing the system’s ability to distribute heat evenly throughout the home. In some cases, a very dirty filter can cause the heat exchanger to overheat, triggering a safety shut-off.
Replace air filters every 30 to 90 days depending on the type of filter and the presence of pets in the home. It is also advisable to have a professional technician perform a “tune-up” which includes cleaning the burners and checking for carbon monoxide leaks. If the home uses a heat pump, ensure the outdoor unit is clear of snow and ice accumulation, as it needs airflow to extract heat from the outside air.
Strategic Temperature Management
Finally, a subtle but impactful mistake involves how the thermostat is managed during the winter. Some homeowners turn the heat off entirely when they leave for work or vacation to save money. This is a high-risk practice. If the interior temperature drops too low, the water in the pipes: even those inside the walls: can freeze.
Maintain a minimum temperature of at least 55 degrees Fahrenheit (13 degrees Celsius) at all times, even when the home is unoccupied. This provides a safety margin in case of a sudden drop in outdoor temperature or a minor draft. For homes with particularly vulnerable plumbing, leaving cabinet doors open under sinks can allow warm air from the room to circulate around the pipes.
Consistent maintenance and attention to these seven areas can significantly change the experience of the winter season. Rather than reacting to emergencies, homeowners can enjoy a more efficient, comfortable, and safe environment. For those interested in more comprehensive guides on home management and seasonal living, the resources at https://www.pariswheel.com provide ongoing educational content.
By taking a proactive approach to winterization: focusing on air sealing, proper drainage, and mechanical maintenance: the risks associated with freezing temperatures are minimized. These steps not only protect the financial investment of the home but also contribute to a sustainable and stress-free living environment. All activities should be performed in accordance with local building codes and safety guidelines, which can often be found in the https://www.pariswheel.com/index.php/terms-and-conditions sections of regional maintenance documents.

