Walls are the backdrop of daily life, but they are also magnets for wear and tear. Moving furniture, door handles swinging too wide, or children playing indoors can lead to a collection of scuffs, scratches, and deep dents. While these imperfections might seem minor individually, they collectively diminish the aesthetic appeal of a home.
Maintaining pristine walls does not require a professional contractor. With the right tools and a systematic approach, most wall damage is manageable for a DIY enthusiast. This guide provides a comprehensive breakdown of how to identify, prep, and repair common wall issues to restore surfaces to their original condition.
Identifying the Level of Wall Damage
Before reaching for a putty knife, it is essential to categorize the damage. Different levels of trauma to drywall or plaster require different materials and techniques.
- Scuffs and Marks: These are superficial. They usually involve a transfer of material onto the paint surface, such as rubber from a shoe or charcoal from a bag, rather than a removal of the wall material itself.
- Minor Scratches and Dents: These are shallow indentations where the surface of the drywall or the paint layer has been compressed or scraped away.
- Small to Medium Holes: These typically range from nail holes to the size of a doorknob. These require structural support via a patch or filler.
- Large Holes: Any damage larger than five or six inches across usually requires a new piece of drywall to be cut and installed.
Understanding the severity of the issue ensures that time and resources are not wasted on over-engineered solutions for simple marks.
The Essential Toolkit for Wall Repair
Having the correct materials on hand prevents mid-project trips to the hardware store. For a standard home repair kit, the following items are recommended:
- Spackling Compound: Lightweight spackle is ideal for small holes and dents because it dries quickly and shrinks very little.
- Joint Compound: Also known as “mud,” this is better for larger repairs and taping joints.
- Putty Knives: A 2-inch knife for small holes and a 6-inch knife for smoothing and feathering larger areas.
- Sandpaper: A variety of grits, specifically 120-grit for initial smoothing and 220-grit for a fine finish.
- Mesh or Metal Patches: Essential for holes that lack a solid backing.
- Primer: A high-quality primer ensures the paint adheres and prevents “flashing” (where the repair shows through the paint).
- Paint: Matched to the existing wall color and sheen.
For those seeking more specific advice on maintaining home interiors, visiting the Frequently Asked Questions section can provide additional clarity on common household maintenance queries.

Removing Scuffs and Surface Marks
Often, what looks like a permanent scratch is simply a surface-level transfer. Before applying any filler, attempt to clean the area.
Gentle Cleaning Solutions
Start with the least abrasive method. A soft sponge dipped in warm water with a drop of mild dish soap can often lift rubber scuffs or crayon marks. Rub in a circular motion, being careful not to saturate the drywall, as moisture can weaken the paper face.
The Power of Melamine Sponges
If soap and water fail, a melamine foam sponge (often sold as “magic” erasers) is highly effective. These sponges act like extremely fine sandpaper. Use them with a light touch; excessive pressure can buff away the paint’s sheen, leaving a dull spot that is visible in direct light.
Chemical Cleaners
For stubborn oil-based marks or grease, a specialized wall cleaner or a solution of TSP (trisodium phosphate) substitute can be used. This is particularly helpful in kitchens where grease buildup can prevent new paint or filler from adhering properly.
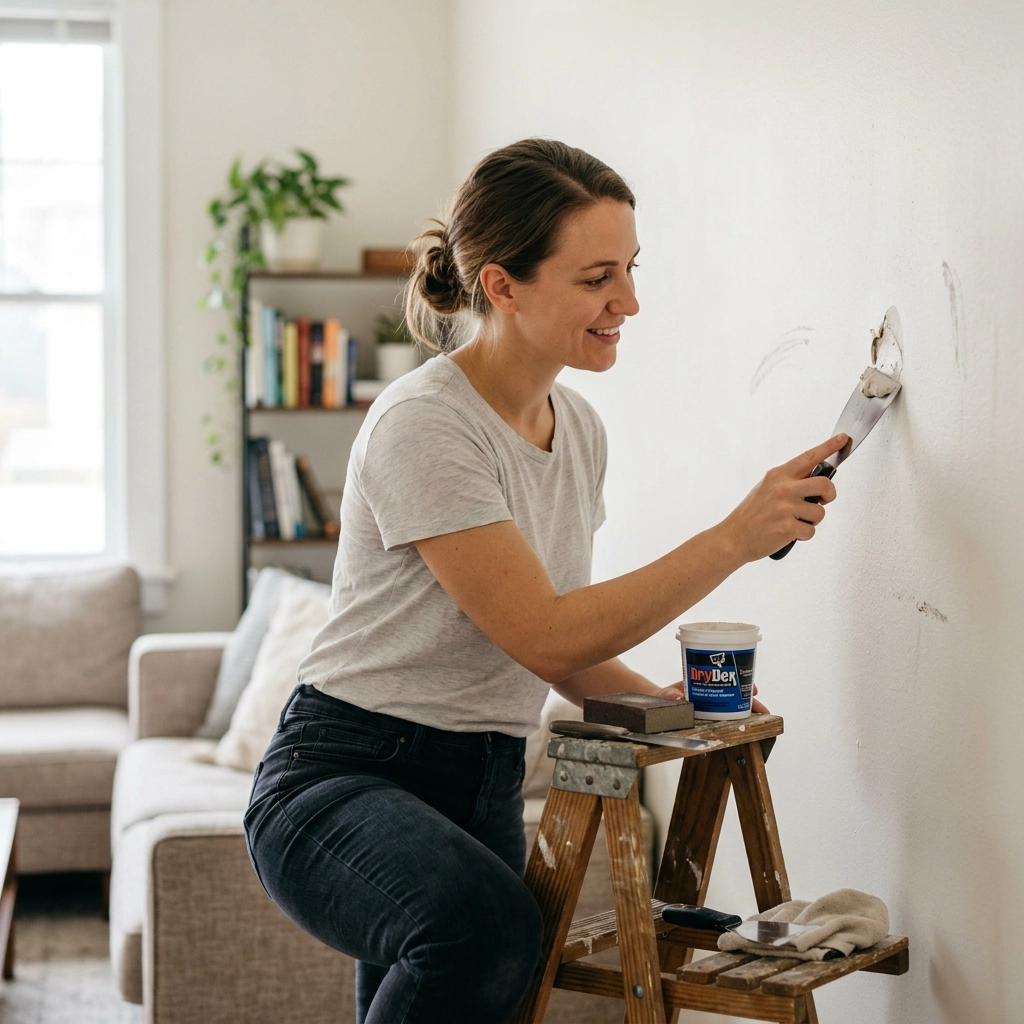
Fixing Minor Scratches and Shallow Dents
Shallow dents are common near baseboards and hallways. These do not penetrate the drywall but create unsightly shadows.
Step 1: Preparation
Clear away any loose paint or drywall paper around the dent using a utility knife. If the edges of the dent are raised, lightly sand them flat. A clean surface is paramount for the spackle to bond.
Step 2: Applying Spackle
Scoop a small amount of lightweight spackle onto a 2-inch putty knife. Press the compound into the dent, then pull the knife across the surface at a 45-degree angle. The goal is to leave the filler slightly higher than the wall surface, as most compounds shrink slightly as the moisture evaporates.
Step 3: Drying and Sanding
Allow the spackle to dry completely. While some products claim to be ready in 30 minutes, waiting a full hour ensures the core is stable. Once dry, use 220-grit sandpaper to smooth the area until it is flush with the surrounding wall. Wipe away the dust with a damp cloth before proceeding to paint.
Repairing Small to Medium Holes
A hole left by a doorknob or a removed wall fixture requires a different approach because there is no “floor” for the filler to rest on.
Using Self-Adhesive Mesh Patches
For holes up to 3 inches, a self-adhesive fiberglass mesh patch is the most efficient solution.
- Clean the Perimeter: Sand the area around the hole to ensure the adhesive on the patch sticks firmly to the wall.
- Apply the Patch: Center the mesh over the hole and press firmly.
- First Coat of Compound: Using a 6-inch putty knife, apply a layer of joint compound over the mesh. Spread the compound outward, “feathering” the edges so the layer becomes thinner as it moves away from the hole.
- Second Coat: Once dry, lightly sand the ridges and apply a second, wider coat. This gradual buildup disguises the hump created by the patch.

Large Hole Repair: The Drywall Replacement Method
When damage exceeds the capacity of a simple patch, a “California Patch” or a piece of replacement drywall is necessary.
Cutting the Damage Out
Use a drywall saw to cut the damaged area into a clean square or rectangle. This makes it easier to fit a replacement piece. Check for any wires or pipes behind the wall before cutting.
Installing Support
If the hole is not located over a wall stud, you must create support. Take a small strip of wood (a “backer board”) and insert it into the hole. Screw it into the existing drywall from the front. This provides a ledge for the new piece of drywall to sit against.
Taping and Finishing
Screw the new drywall patch into the backer board. Cover the seams with joint tape (either paper or mesh). Apply three thin layers of joint compound, allowing each to dry and sanding between applications. The final coat should extend 6 to 12 inches beyond the repair to blend the elevation change.
For more technical support or if complications arise during structural repairs, the Customer Help page can be a valuable resource for finding professional guidance.
Mastering the Art of Sanding
Sanding is where most DIY repairs fail or succeed. The objective is not just to make the filler smooth, but to make the transition between the filler and the wall invisible to the eye and touch.
- Use a Sanding Block: Do not use your fingers to hold the sandpaper; this creates uneven pressure and results in a wavy surface. A sanding block ensures a perfectly flat finish.
- The Light Test: Hold a flashlight or a work lamp parallel to the wall. The “raking light” will cast long shadows over any bumps or dips that need further attention.
- Dust Management: Drywall dust is extremely fine and can travel throughout a home. Use a vacuum with a HEPA filter or hang plastic sheets to contain the debris.

Priming and Color Matching
Even the best repair will be ruined by a poor paint job. Spackle and joint compound are highly porous; if you paint directly over them, they will soak up the moisture, resulting in a dull, mismatched spot known as flashing.
The Importance of Primer
Apply a dedicated primer to the repaired area. This seals the porous filler and provides a uniform texture for the topcoat of paint.
Achieving a Perfect Match
If the original paint can is no longer available, use a utility knife to carefully peel a 2-inch square of the top layer of paint from a discreet area (like behind a baseboard or inside a closet). Take this sample to a paint store for professional color matching.
When applying the paint, do not just cover the patch. Use a “stippling” motion with the brush or a small roller to mimic the texture of the surrounding wall. If the wall has a heavy texture like “orange peel,” you may need to apply a spray-on texture product before painting.
Troubleshooting Common Issues
Despite best efforts, repairs can sometimes go wrong. Here is how to fix common mistakes:
- Cracking Filler: This usually happens if the layer was applied too thick or the room is too hot. Sand the cracks, apply a very thin layer of vinyl-based filler, and allow it to dry slowly.
- Visible Edges: If you can see the outline of your patch after painting, you did not feather the edges far enough. You will need to sand the area down and apply a wider layer of compound.
- Texture Mismatch: If the repair is smooth but the wall is textured, it will stand out. Use a damp sponge to dab joint compound onto the repair to recreate the look of a roller nap or spray texture.
For more information on the terms used in these processes, the Terms and Conditions and About pages offer context on the company’s standards and educational approach.

Maintenance and Prevention
Preventing wall damage is easier than repairing it. Simple adjustments to the home environment can save hours of work later.
- Install Door Stops: A simple rubber-tipped stop prevents doorknobs from puncturing the drywall.
- Furniture Bumpers: Small adhesive felt pads placed on the back of chairs or sofas prevent them from scuffing the paint.
- Use High-Quality Paint: In high-traffic areas like hallways, use a “washable” or “scrubbable” paint finish like eggshell or satin. These are much easier to clean than flat or matte finishes.
If you are looking for more tips on home upkeep and lifestyle improvements, consider browsing the Paris Wheel Blog for a variety of educational articles.
Final Inspection Checklist
Before putting away the tools, run through this final checklist to ensure a professional-grade result:
- Touch Test: Run a hand over the repair. If you can feel a ridge, the eye will eventually see it.
- Visual Test: View the wall from multiple angles, especially during different times of the day when natural light changes.
- Cleanliness: Ensure all sanding dust is removed from baseboards and floors, as this dust can settle into the wet paint of future projects.
By following these systematic steps, any homeowner can maintain the integrity and beauty of their walls. Whether it is a small scuff from a move or a hole from a minor accident, the skills of patching, sanding, and painting are essential components of home ownership.
For those interested in staying updated with more practical guides and learning opportunities, the Newsletter is an excellent way to receive regular insights directly. Staying informed ensures that when the next dent appears, the solution is already at hand.


