As the autumn leaves begin to fall and the air turns crisp, the focus of home maintenance shifts toward the approaching cold. Winterizing a home is more than just a seasonal chore; it is a critical process that protects a primary investment, ensures the comfort of the occupants, and maintains the structural integrity of the building. When temperatures drop, the physical stresses on a house increase. Water expands as it freezes, cold air seeks out even the smallest gaps, and heating systems are pushed to their limits.
A systematic approach to winterization can prevent costly emergency repairs, such as burst pipes or roof leaks, while significantly reducing monthly energy expenditures. This guide provides a comprehensive roadmap for preparing every part of the home: from the rooftop to the basement: for the challenges of the winter season.
The Exterior Envelope: Protecting the Shell
The first line of defense against winter weather is the exterior of the home. This “envelope” must be inspected for any vulnerabilities that could allow moisture or cold air to penetrate.
Gutter and Downspout Maintenance
Clogged gutters are one of the most common causes of winter home damage. When gutters are full of leaves and debris, water cannot flow away from the house. In freezing temperatures, this standing water turns to ice, creating “ice dams.” These dams can force water back under the roof shingles and into the walls or ceiling of the home.
Cleaning gutters thoroughly before the first freeze is essential. After removing debris, flush the gutters with water to ensure the downspouts are clear. Downspouts should direct water at least three to four feet away from the foundation to prevent basement flooding or soil erosion.
Roof Inspection
A visual inspection of the roof can reveal potential issues before they become disasters. Look for missing, cracked, or curling shingles. Inspect the flashing around chimneys, vents, and skylights, as these are common points for leaks. While minor repairs can often be handled by a homeowner, extensive damage or steep pitches may require professional assistance.
Siding and Foundation
Examine the exterior walls for cracks or holes. Even small gaps in the siding or foundation can allow pests to enter the home seeking warmth. Use an exterior-grade caulk to seal small gaps and cracks. For larger holes in the foundation, a hydraulic cement or specialized masonry repair product may be necessary.

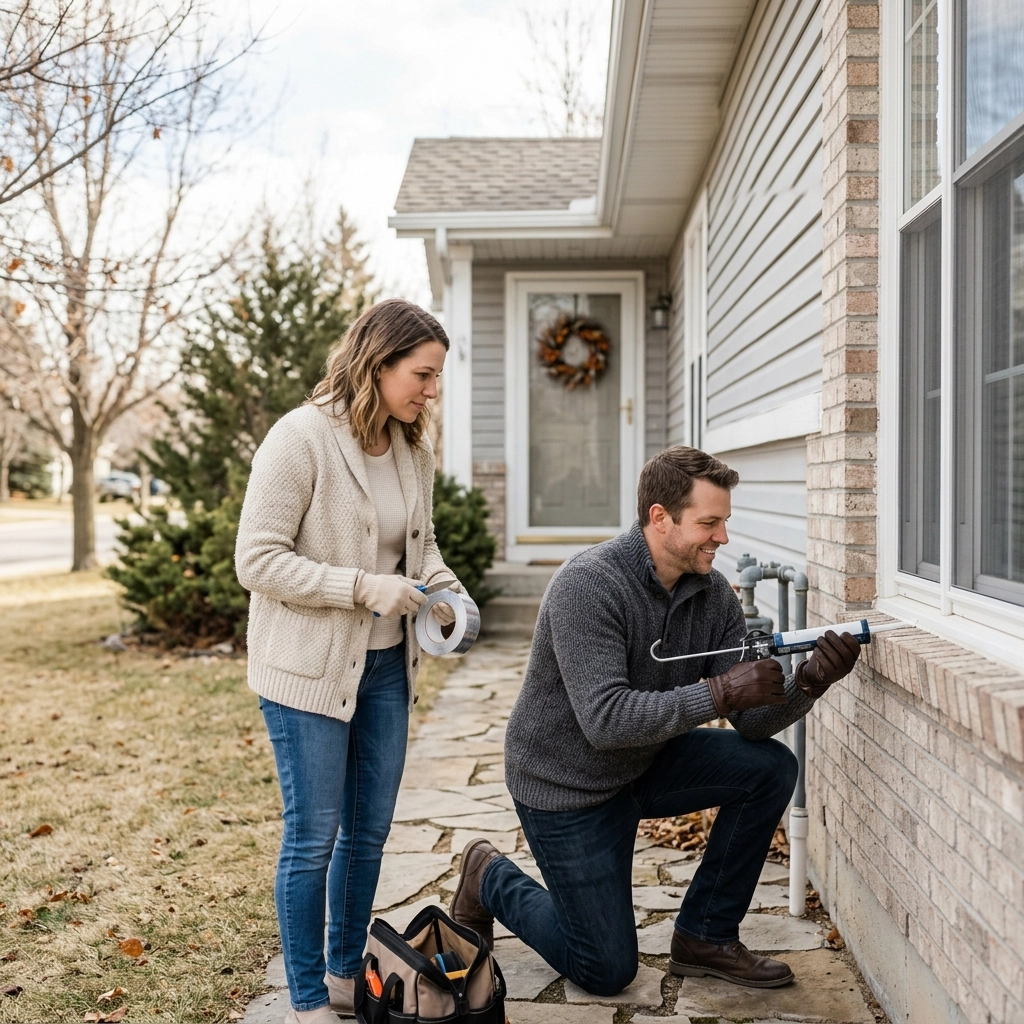
Windows and Doors: Eliminating Drafts
A significant portion of a home’s heat loss occurs through windows and doors. Sealing these areas is one of the most cost-effective ways to improve home comfort and lower heating bills.
Identifying Air Leaks
To find drafts, a simple test involves moving a lit incense stick or a damp hand along the edges of windows and doors on a windy day. If the smoke wavers or the hand feels a chill, air is escaping. Check the frames, the sash, and the area where the window meets the wall.
Caulking and Weatherstripping
Weatherstripping is the most effective way to seal moving parts, such as the gaps between a door and its frame or a window sash and the sill. There are several types of weatherstripping available, including V-seal, felt, and foam tape. Choose a material that is durable enough for the location and provides a tight seal without interfering with the operation of the window or door.
For stationary gaps, such as those between the window frame and the wall, silicone or acrylic latex caulk is the standard solution. Ensure the area is clean and dry before applying a smooth bead of caulk to the gap.
Window Film and Heavy Curtains
In older homes with single-pane windows, applying a clear plastic window film can create an extra layer of insulation. The film is applied with double-sided tape and shrunk to a tight, clear fit using a hairdryer. This mimics the effect of a double-pane window. Additionally, replacing light summer curtains with heavy, thermal-lined drapes can provide a significant barrier against the cold glass.

Plumbing and Pipe Protection
Plumbing failures are perhaps the most destructive of all winter-related home issues. When water freezes inside a pipe, the pressure can cause the pipe to burst, leading to thousands of dollars in water damage.
Outdoor Faucets and Hoses
The first step in plumbing winterization is disconnecting all garden hoses. A hose left attached can hold water that freezes back into the pipe inside the wall. Once hoses are removed, turn off the interior shut-off valve for the outdoor faucets and drain the remaining water from the line. If the home does not have interior shut-off valves for outdoor taps, install insulated faucet covers to provide a layer of protection against the frost.
Insulating Exposed Pipes
Pipes located in unheated areas, such as basements, crawl spaces, attics, and garages, are at the highest risk. Foam pipe sleeves are an inexpensive and easy-to-install solution. Simply slip the sleeve over the pipe and seal the edges with duct tape or the self-sealing adhesive provided with the product. Pay special attention to corners and joints, as these are often the most vulnerable points.
Preventing Freezes During Extreme Cold
During periods of sustained, sub-zero temperatures, even insulated pipes can freeze. On these nights, it is helpful to leave a very slow drip of water running from faucets connected to exposed pipes. Moving water is less likely to freeze. Additionally, keeping cabinet doors open under sinks in kitchens and bathrooms allows warm room air to circulate around the plumbing.

HVAC and Heating System Efficiency
The heating system is the heart of the home during the winter months. Ensuring it is running efficiently is vital for both comfort and safety.
Furnace and Heat Pump Maintenance
Before the heating season begins, replace the air filter. A dirty filter restricts airflow, forcing the system to work harder and increasing energy consumption. It is generally recommended to change filters every 30 to 90 days, depending on the type of filter and whether there are pets in the home.
Consider scheduling a professional “tune-up.” A technician can clean the burners, inspect the heat exchanger for cracks (which could leak carbon monoxide), and ensure all components are operating safely.
Thermostat Management
Installing a programmable or smart thermostat can lead to significant savings. By lowering the temperature by 10 to 15 degrees for eight hours a day (such as when the house is empty or residents are sleeping), homeowners can save up to 10% on heating costs. Smart thermostats can learn routines and adjust temperatures automatically based on occupancy.
Fireplaces and Chimneys
If the home has a wood-burning fireplace, the chimney should be inspected and cleaned by a professional sweep once a year to remove creosote buildup. Creosote is highly flammable and is the leading cause of chimney fires. When the fireplace is not in use, ensure the damper is closed tightly to prevent warm air from escaping up the chimney.

Insulation and Air Exchange
Adequate insulation is what keeps the generated heat inside the living spaces. Without it, the furnace will run constantly to replace heat that is leaking out through the ceiling and floor.
The Attic
Because heat rises, the attic is the most important area to insulate. Check the depth of the insulation; in most climates, 12 to 15 inches of fiberglass or cellulose insulation is recommended. Ensure that insulation does not block the soffit vents, which are necessary for proper attic ventilation. Ventilation prevents moisture buildup and keeps the roof cool, which helps prevent ice dams.
Basement and Crawl Space
In the basement, focus on the “rim joist”: the area where the house frame meets the foundation. This is a major source of air infiltration. Rigid foam insulation or spray foam can be used to seal and insulate these gaps. If the home has a crawl space, ensure the ground is covered with a vapor barrier to prevent moisture from rising into the floor joists.
Electrical Outlets
Surprisingly, air can leak through electrical outlets on exterior walls. Small foam gaskets can be installed behind the outlet cover plates to block these drafts. This is a quick and inexpensive DIY project that contributes to the overall airtightness of the home.
Outdoor Areas and Landscaping
Preparing the yard for winter protects plants and prevents outdoor equipment from deteriorating.
Lawn and Garden Care
Mow the lawn one last time, slightly shorter than usual, to prevent snow mold. Apply a winterizing fertilizer high in potassium to help grass roots survive the dormant season. For delicate shrubs, wrapping them in burlap can provide protection against heavy snow and drying winter winds.
Outdoor Furniture and Equipment
Clean outdoor furniture and store it in a garage or shed if possible. If furniture must remain outside, use heavy-duty waterproof covers. Drain the fuel from lawnmowers or add a fuel stabilizer, and ensure that snow blowers are serviced and ready for the first storm. If you are storing items in a vehicle, using a car trunk storage bag can help keep winter emergency supplies organized and accessible.
Safety and Emergency Preparedness
Winter brings specific safety risks, including fire hazards from space heaters and the danger of carbon monoxide poisoning from malfunctioning heating units.
Detector Testing
Winter is the most critical time to ensure smoke and carbon monoxide (CO) detectors are functioning. Test every unit in the house and replace batteries if they are more than six months old. CO is a colorless, odorless gas; because homes are sealed tightly in the winter, a CO leak can be fatal. Every floor of the home should have at least one CO detector.
Emergency Kits
Heavy snow or ice storms can lead to power outages. Every home should have an emergency kit that includes:
- Flashlights and extra batteries.
- A portable radio.
- A three-day supply of non-perishable food and water.
- A first-aid kit.
- Extra blankets and warm clothing.
For those who enjoy reading during long winter nights, having a bookmark light is a practical addition to an emergency kit, providing a low-power light source for reading if the electricity goes out.
Snow and Ice Removal
Keep shovels and ice melt in a reachable location. When choosing ice melt, consider products that are safe for pets and do not damage concrete. Keeping walkways clear is not only a matter of convenience but a safety requirement to ensure that emergency services or delivery personnel can safely reach the front door.

Summary of Seasonal Maintenance
Winterizing a home is a comprehensive process that requires attention to detail across various systems. By addressing the exterior envelope, sealing doors and windows, protecting plumbing, and maintaining heating systems, a homeowner creates a resilient environment capable of withstanding the harshest conditions.
Taking these steps proactively avoids the stress and high costs of emergency repairs. A well-winterized home is not only more comfortable and efficient but also a safer place to reside throughout the colder months. Consistency in these routines year after year ensures the long-term health of the property and provides peace of mind as the first snow begins to fall. For more information on maintaining a comfortable living environment, explore the resources available at Paris Wheel.

