Drywall is the standard material for interior walls in modern construction due to its affordability and ease of installation. However, despite its prevalence, it is susceptible to various forms of minor damage. From the inevitable nail holes left by picture frames to the accidental scuff marks from moving furniture, wall imperfections are a common reality for any homeowner or tenant.
Repairing these issues does not require professional intervention. With the right tools and a systematic approach, minor drywall damage can be resolved quickly and effectively. Mastering these skills is a fundamental part of home maintenance that preserves the aesthetic integrity and value of a property.
Understanding Drywall Composition
Before beginning repairs, it is helpful to understand the material. Drywall, also known as gypsum board or plasterboard, consists of a core of gypsum plaster sandwiched between two thick sheets of paper. The paper provides structural integrity, while the gypsum provides fire resistance and a smooth surface.
When damage occurs, the goal is to bridge the gap in the gypsum core and restore the continuity of the paper surface. Understanding that drywall is essentially a compressed mineral helps in choosing the right compounds for filling and the right techniques for finishing.
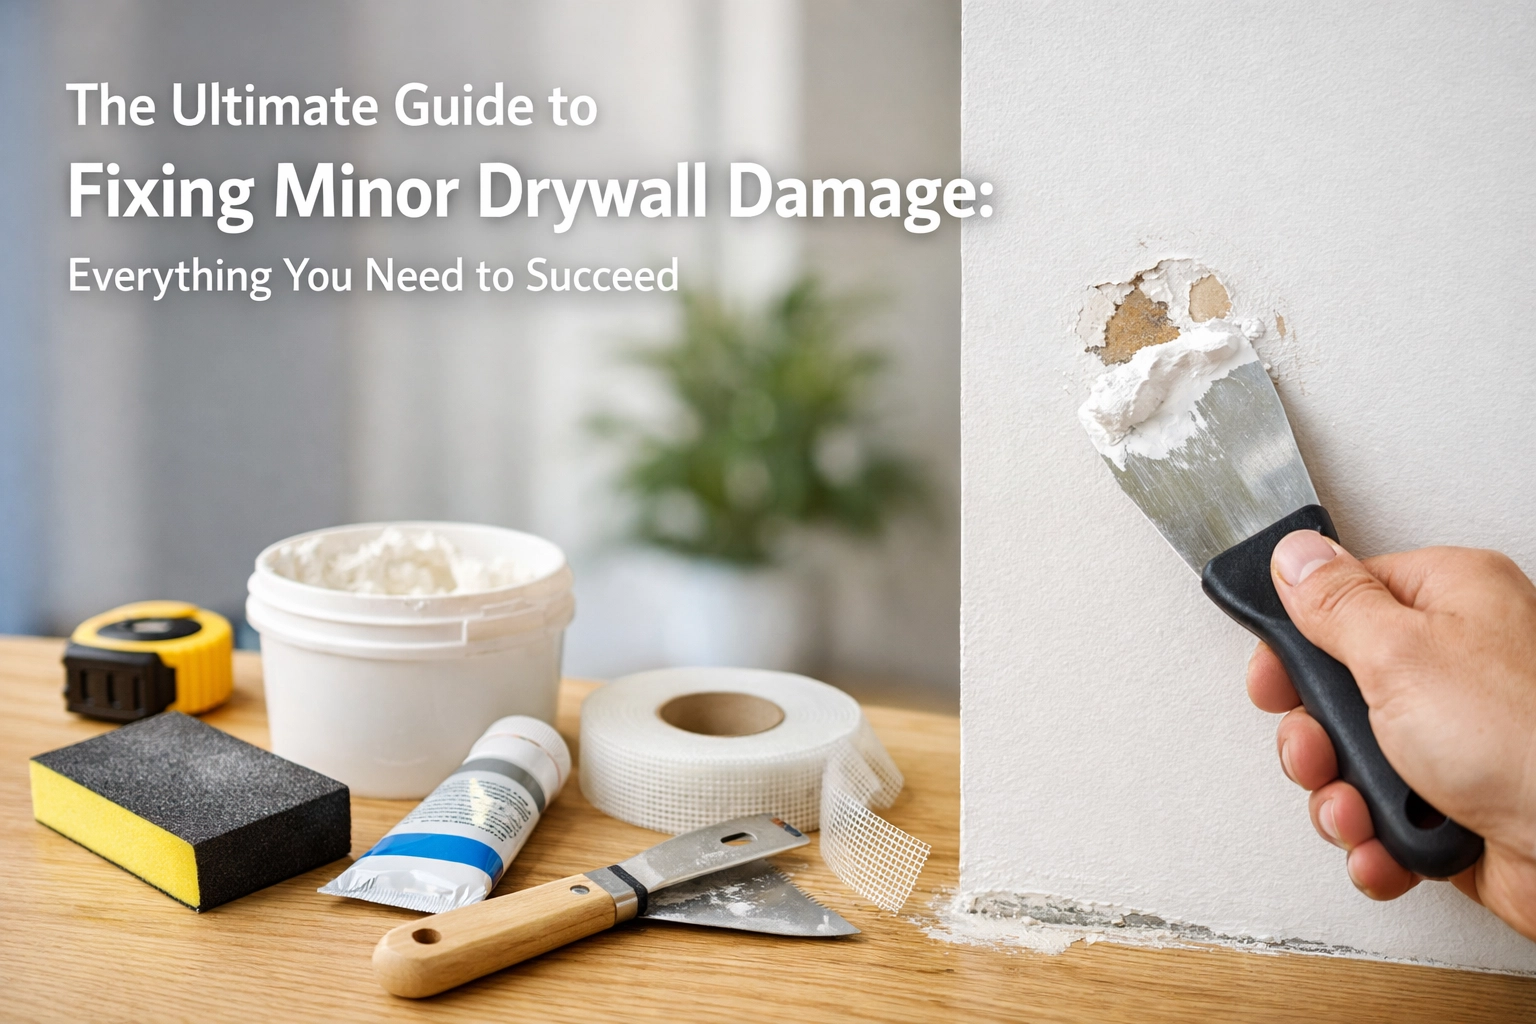
Essential Tools and Materials
A successful repair depends on having the correct supplies ready before starting the project. While specialty tools exist, most minor repairs can be completed with a basic kit.
Patching Compounds
- Spackle: Best for tiny holes (less than 1/2 inch). Lightweight spackle dries quickly and shrinks very little.
- Joint Compound (All-Purpose): Ideal for larger repairs. It provides a stronger bond and is easier to sand over large areas than heavy-duty spackle.
- Setting-Type Compound: Also known as “hot mud,” this comes in powder form and hardens through a chemical reaction. It is used for deeper holes where shrinkage must be minimized.
Tools for Application
- Putty Knives: A 2-inch knife is perfect for nail holes, while a 6-inch flexible joint knife is necessary for feathering out larger patches.
- Sanding Supplies: Fine-grit sandpaper (120 to 150 grit) or a medium-grit sanding sponge.
- Adhesive Mesh Patch: Essential for holes between 1 and 3 inches to provide structural support for the compound.

Categorizing Drywall Damage
Not all damage is treated the same. Categorizing the issue determines the repair strategy and the materials required.
Tiny Punctures and Nail Holes
These are the most common forms of damage, typically measuring less than 1/4 inch in diameter. They are usually the result of hanging artwork, mirrors, or clocks. Because the structural integrity of the wall is not compromised, these repairs are the simplest to execute.
Small to Medium Holes
Holes ranging from 1/2 inch to 3 inches often result from wall anchors, door handles striking the wall, or localized impacts. These require a reinforcement layer, such as mesh tape or a self-adhesive patch, to prevent the dried compound from cracking or falling out of the cavity.
Surface Abrasions and Scuffs
These involve damage to the paper layer rather than the gypsum core. Scuffs from rubber, furniture, or toys often leave marks that cannot be washed away. Deep scratches may gouge the paper without creating a hole, requiring a thin “skim coat” to level the surface.
Repairing Tiny Punctures (Step-by-Step)
For holes left by nails or screws, the objective is to fill the void without creating a large hump on the wall surface.
- Preparation: Use the handle of the putty knife to gently press into the hole. This creates a slight indentation, ensuring no frayed paper or gypsum bits protrude above the wall surface.
- Application: Place a small amount of spackle on the edge of a 2-inch putty knife. Press the spackle into the hole with a firm downward stroke.
- Leveling: Hold the knife at a 45-degree angle and swipe across the hole to remove excess material. The goal is to leave the spackle flush with the wall.
- Drying and Sanding: Allow the spackle to dry completely. Lightweight spackle may dry in 15 to 30 minutes. Once dry, lightly buff the area with fine-grit sandpaper.
- Clean Up: Wipe away any dust with a damp cloth before proceeding to paint.
Fixing Small to Medium Holes (1 to 3 Inches)
When a hole is too large for spackle alone, it requires a “bridge” to support the repair material.
- Clean the Edges: Use a utility knife to trim away any loose paper or crumbling gypsum around the hole. The edges should be firm.
- Apply the Patch: Center a self-adhesive mesh patch over the hole. Press it firmly against the wall, ensuring the adhesive creates a good bond.
- The First Coat: Using a 6-inch joint knife, apply a layer of all-purpose joint compound over the mesh. Start from the center and spread outward. The layer should be thick enough to cover the mesh but thin enough to see the texture of the mesh slightly through the mud.
- Feathering: This is the most critical step. Extend the compound 2 to 3 inches beyond the edges of the patch. Taper the thickness so it is thinnest at the outer edges.
- Second Coat: Once the first coat is dry, sand away any high ridges. Apply a second, wider coat of compound (using an 8-inch or 10-inch knife if available) to further blend the patch into the surrounding wall.
- Final Sanding: Use a fine-grit sanding sponge to smooth the edges until the transition between the patch and the wall is undetectable to the touch.

Addressing Surface Scuffs and Water Stains
Surface issues often require different chemical treatments than physical holes.
Removing Scuff Marks
Before reaching for the joint compound, attempt to clean the area. A “magic” melamine sponge is often effective at removing scuffs from shoes or furniture. If the scuff has removed the paint or gouged the paper, a very thin layer of spackle (a skim coat) should be applied and sanded flat.
Treating Water Stains
Water stains from old leaks are common in ceilings and near windows. Simply painting over a water stain is rarely successful, as the tannins in the water will bleed through the new paint.
- Ensure Dryness: The source of the leak must be fixed, and the drywall must be completely dry.
- Seal the Stain: Apply a stain-blocking primer. Oil-based or shellac-based primers are superior for this task as they create a moisture-proof barrier that prevents the stain from migrating upward.
- Finish: Once the primer is dry, the area can be painted to match the rest of the surface.
Repairing Corner Bead Damage
Corners are high-traffic areas prone to chipping. Most external corners are reinforced with a metal or plastic “corner bead” hidden under the joint compound.
- Remove Loose Material: Use a putty knife to scrape away any loose paint or cracked compound. If the metal bead is dented, it may need to be gently tapped back into place with a hammer.
- Re-Mudding: Apply joint compound to one side of the corner at a time. Use the corner bead as a guide for your knife.
- Setting: Allow one side to dry before attempting the second side to avoid “pulling” the wet mud off the corner.
- Sanding: Use a sanding sponge specifically designed for corners to maintain the sharp 90-degree angle.

The Art of Sanding and Dust Management
Sanding is the most labor-intensive and messiest part of drywall repair. However, it is the step that determines the quality of the final result.
- Light Touch: Avoid pressing too hard. Drywall compound is soft and easy to remove. Over-sanding can expose the mesh patch or the drywall paper, requiring a re-application of compound.
- Circular Motion: Use broad, circular motions to blend the edges.
- Lighting: Hold a flashlight or work light at an angle against the wall. This “raking light” highlights shadows caused by bumps or depressions that might be invisible under normal overhead lighting.
- Dust Control: Sanding creates extremely fine dust. It is advisable to cover furniture and electronics in the vicinity with plastic sheeting. Using a damp sanding sponge can significantly reduce airborne dust, though it requires more frequent rinsing.
Priming and Texture Matching
Once the surface is smooth and clean, the final step is restoration. Many homeowners make the mistake of painting directly over dry joint compound. Because the compound is highly porous, it will absorb the moisture from the paint unevenly, leading to a dull spot known as “flashing.”
Priming
Always apply a layer of drywall primer to the repaired area. This seals the compound and ensures the topcoat of paint adheres properly and maintains a consistent sheen. For more information on maintaining various home surfaces, resources at Paris Wheel offer insights into broader home care strategies.
Matching Texture
If the wall has a specific texture, such as “orange peel” or “knockdown,” a smooth patch will stand out.
- Aerosol Texture: Spray cans of wall texture are available at hardware stores. Test the spray pattern on a piece of cardboard first to match the intensity of the wall’s existing texture.
- Manual Texturing: For light textures, a stippling brush or a damp sponge can be used to dab wet compound onto the patch before it dries.

Common Pitfalls to Avoid
Even simple repairs can go wrong if certain details are overlooked.
- Using Too Much Compound: It is much easier to apply a second thin coat than it is to sand down a massive hump of dried mud.
- Skipping the Patch: Forcing compound into a 2-inch hole without a mesh patch will almost certainly result in the repair cracking or falling out as the house shifts or the temperature changes.
- Painting Too Soon: Joint compound may look dry on the surface but still hold moisture in the center. Painting over damp compound traps moisture, which can lead to bubbling or mold growth.
- Ignoring the Dust: Failing to wipe away sanding dust will prevent the paint from sticking to the wall, causing it to peel off in sheets later.
When to Call a Professional
While most minor damage is a DIY task, certain situations require professional expertise. If a hole is larger than 6 inches, it usually requires cutting out a square section of drywall and installing a new piece backed by wooden supports (cleats). Furthermore, if cracks appear suddenly and span from floor to ceiling or emanate from the corners of doors and windows, it may indicate structural settling or foundation issues rather than simple drywall fatigue.
For standard wear and tear, however, the methods outlined above provide a reliable path to success. By taking the time to prep the area, using the appropriate materials for the size of the hole, and mastering the art of the feathered edge, any homeowner can maintain walls that look as pristine as the day they were installed. For those interested in further developing their practical skills, exploring the sitemaps at https://www.pariswheel.com/wp-sitemap-posts-post-1.xml can provide a wealth of educational content across various categories.
Maintaining a home is an ongoing process of observation and small corrections. By addressing drywall damage as it occurs, the task remains manageable and prevents small imperfections from becoming major eyesores. Success in drywall repair is not about speed, but about patience during the drying and sanding phases, ensuring each layer contributes to a seamless, invisible finish.

